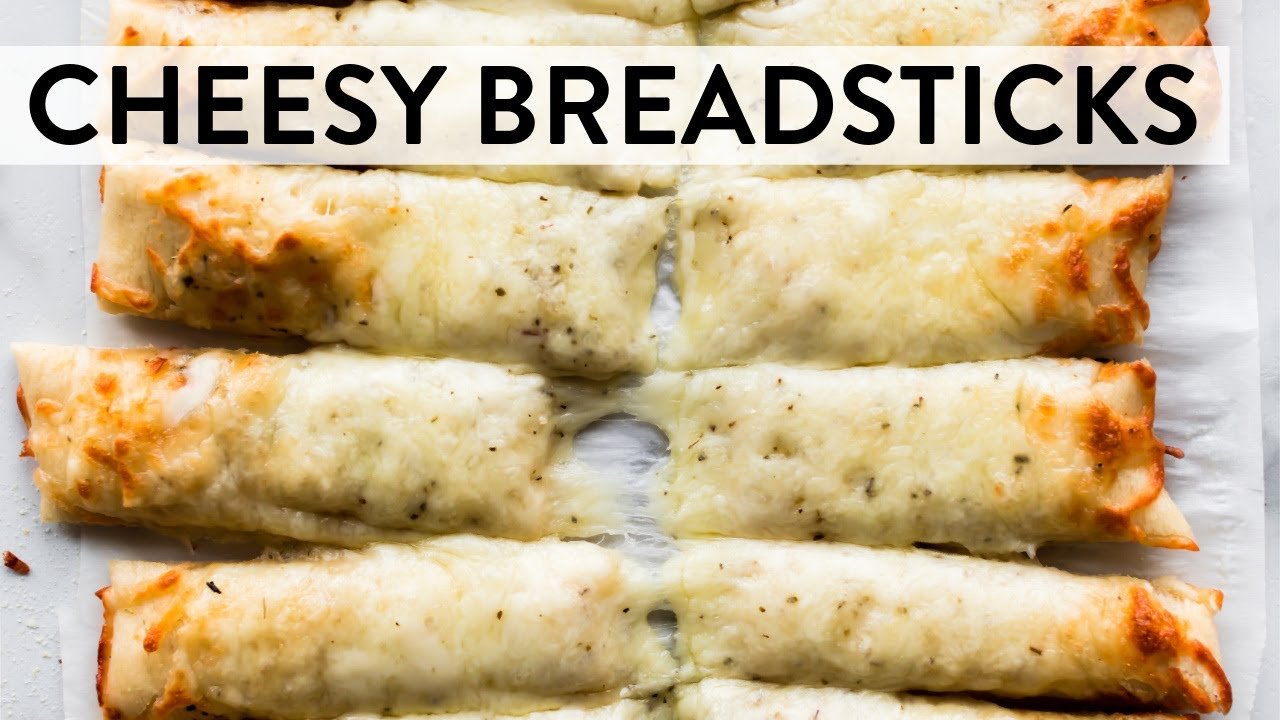
Homemade Cheesy Garlic Breadsticks Recipe
Get ready to indulge in a delicious and easy-to-make snack with this homemade cheesy garlic breadsticks recipe. Cheesy breadsticks are a classic favorite. Adding garlic takes the flavor to a whole new level. This recipe is perfect for those who love garlic breadsticks and want to try a homemade version.
Imagine sinking your teeth into a crispy, golden-brown breadstick. It’s filled with the richness of melted cheese and the depth of garlic flavor. This homemade cheesy garlic breadsticks recipe is a game-changer. It’s easier to make than you think. With just a few simple ingredients, you can create a delicious snack that’s perfect for any occasion.

Whether you’re a fan of cheesy breadsticks or garlic breadsticks, this recipe is sure to become a new favorite. The best part is that you can customize it to your taste. Add your favorite herbs and spices to create a unique flavor combination. So why settle for store-bought breadsticks when you can make your own homemade cheesy garlic breadsticks recipe?
Key Takeaways
- Easy to make and requires minimal ingredients
- Perfect for snacking, parties, or as a side dish
- Customizable with your favorite herbs and spices
- Cheesy breadsticks and garlic breadsticks combined in one recipe
- Homemade cheesy garlic breadsticks recipe is a cost-effective alternative to store-bought options
- Can be made in under an hour, making it a great option for busy days
Why Make Homemade Cheesy Garlic Breadsticks
Making homemade cheesy garlic breadsticks is fun and rewarding. You can make delicious breadsticks from scratch. They’re great for snacking or as a side dish.
Homemade breadsticks let you customize flavors to your liking. This is something store-bought options can’t offer.
One big advantage of making breadsticks from scratch is saving money. You can make a batch for less than store-bought. Plus, you control the ingredients and portion sizes. This is good for those with dietary needs.
Benefits of Making Breadsticks from Scratch
- Cost savings: Making homemade breadsticks can be more cost-effective than buying store-bought options.
- Customization: With an easy breadsticks recipe, you can tailor the flavors to your liking and create unique variations.
- Satisfaction: Creating something delicious from scratch can be a fun and rewarding experience.
Making homemade cheesy garlic breadsticks is a great way to enjoy a delicious snack or side dish. With an easy recipe and simple ingredients, you can make perfect breadsticks for any occasion.

Pro Tips for Perfectly Crispy Breadsticks
To get the perfect crunch and flavor in your cheesy breadsticks, focus on a few key steps. First, prepare the dough carefully. Make sure it’s not overworked, as this can make the breadsticks tough. A gentle touch when mixing and kneading helps keep the ingredients balanced.
This balance is key for a crispy outside and a soft inside. When baking, the temperature is crucial. A slightly higher temperature can help achieve that golden brown color and crunch. Also, choosing the right cheese and applying it evenly greatly impacts the flavor and texture of your garlic breadsticks.
Dough Preparation Secrets
- Use a combination of all-purpose flour and bread flour for a better texture
- Avoid overmixing the dough to prevent tough breadsticks
- Let the dough rest for a sufficient amount of time to allow the yeast to activate
Baking Temperature Guidelines
Bake your cheesy breadsticks in a preheated oven at 400°F (200°C) for 12-15 minutes. They should be golden brown. Keep an eye on them to avoid overcooking, which can ruin their texture and flavor.
Common Mistakes to Avoid
When making homemade breadsticks, it’s key to avoid common mistakes. These can ruin the texture and flavor of your dish. One big error is overworking the dough, making it tough and dense.
To prevent this, mix the ingredients just until they form a shaggy mass. Then, let the dough rest for a few minutes before kneading. Not letting the dough rise enough is another mistake. This can make your breadsticks heavy and not light and airy.
Allow the dough to rise for at least an hour. Or until it has doubled in size. Here are more mistakes to watch out for when making homemade breadsticks:
- Not using the right type of flour, which can affect the texture and flavor of your breadsticks from scratch
- Not kneading the dough long enough, which can lead to a dense and chewy texture
- Not baking the breadsticks at the right temperature, which can affect their crispiness and flavor
By avoiding these mistakes, you can make delicious homemade breadsticks. Always use fresh ingredients and follow the recipe carefully for the best results.

Delicious Variations and Flavor Combinations
Homemade snacks like cheesy garlic bread are perfect for trying new things. You can add dried oregano or thyme for a savory twist. This makes your snack even more exciting.
Choosing the right cheese can make a big difference. Try mixing mozzarella with parmesan or cheddar with feta. You can also use different milks or yogurts to add unique flavors.
Herb and Spice Options
- Basil and garlic for a classic Italian flavor
- Rosemary and olive oil for a more Mediterranean taste
- Cilantro and lime juice for a fresh and zesty flavor
Cheese Blend Suggestions
- Mozzarella and parmesan for a creamy and sharp combination
- Cheddar and feta for a rich and tangy flavor
- Gouda and provolone for a smooth and nutty taste
Exploring different flavors can lead to amazing homemade snacks. Whether you want something simple or complex, the secret is finding the right mix. With a bit of creativity, you can make a cheesy garlic bread that wows everyone.
| Flavor Combination | Herb and Spice Options | Cheese Blend Suggestions |
|---|---|---|
| Italian | Basil and garlic | Mozzarella and parmesan |
| Mediterranean | Rosemary and olive oil | Feta and kalamata olives |
| Mexican | Cilantro and lime juice | Queso fresco and salsa |

Storage and Reheating Guidelines
To keep your homemade cheesy garlic breadsticks fresh, store them right. Place them in an airtight container at room temperature for up to 3 days. For longer storage, freeze them. Put the breadsticks in a single layer on a baking sheet, then move them to a freezer-safe bag or container.
Reheating your garlic breadsticks is simple. Preheat your oven to 350°F (180°C). Bake them for 5-7 minutes, or until crispy. You can also reheat them in the microwave for 20-30 seconds. Making a batch of homemade cheesy garlic breadsticks is a great idea for later use.
Here are some tips for using leftover breadsticks:
- Use them as croutons in salads
- Make breadsticks crumbs for coating chicken or fish
- Use them as a base for appetizers, such as spinach and artichoke dip
By following these storage and reheating guidelines, you can enjoy your homemade cheesy garlic breadsticks for longer. Whether you’re making an easy breadsticks recipe or a more complex one, proper storage and reheating are key. They help keep the flavor and texture just right.

Conclusion: Mastering Your Homemade Breadsticks
Congratulations on reaching the end of our journey toward perfecting your homemade breadsticks! By following the step-by-step recipe and expert tips, you are well on your way to becoming a breadsticks from scratch master. Remember, the key to outstanding appetizer recipe lies in attention to detail, experimentation, and a little bit of patience.
Don’t be afraid to get creative with your breadsticks – try out different cheese blends, fresh herbs, or even a sprinkle of garlic powder for an extra kick of flavor. The possibilities are endless when you’re making homemade breadsticks from scratch. Keep practicing, and soon you’ll be whipping up bakery-worthy breadsticks from scratch with ease.
For more inspiration and recipe ideas, be sure to check out our collection of delicious appetizer recipes. Happy baking!
FAQ
What are the key ingredients for homemade cheesy garlic breadsticks?
To make homemade cheesy garlic breadsticks, you’ll need flour, yeast, and warm water. Also, olive oil, salt, garlic powder, and shredded cheese (like mozzarella or Parmesan) are crucial.
What kitchen tools and equipment are needed to make breadsticks from scratch?
You’ll need a mixing bowl, a wooden spoon, and a rolling pin. A baking sheet and a pizza cutter or knife are also essential. Optional tools include a stand mixer, parchment paper, and a pastry brush.
What are some common mistakes to avoid when making homemade cheesy garlic breadsticks?
Avoid overworking the dough and overbaking the breadsticks. Using the wrong cheese or too much of it is another mistake. Also, don’t let the dough rise for too long and preheat the oven correctly.
Can I customize the flavor of the breadsticks?
Yes, you can customize the flavor. Try different herbs and spices, cheese blends, or even gluten-free or vegan options.
How should I store and reheat leftover breadsticks?
Store leftover breadsticks in an airtight container at room temperature for up to 3 days. To reheat, place them in a 350°F oven for 5-10 minutes until crispy and warm.